Article assumptions:
- You are a Jet staff user on Jet Hub
- The Yealink device is plugged into power and internet and displays an IPv4 address in the Status menu.
- You have access to a web browser on a computer that shares the Network connection with the Yealink phone. If this device is with a client, you will need to do a Zoom meeting and ask them to share their computer screen, then request remote control to access their browser.
- The PBX creation time was greater then 15 minutes ago, and the Jet phone apps are able to be activated. THIS IS REQUIRED.
How to configure the extension
- Navigate to the account's Extensions page and select Download. This will download the system information for their phone system.

- Into your browser bar, type the IP address displayed on the phone. This will bring up the Yealink login page.
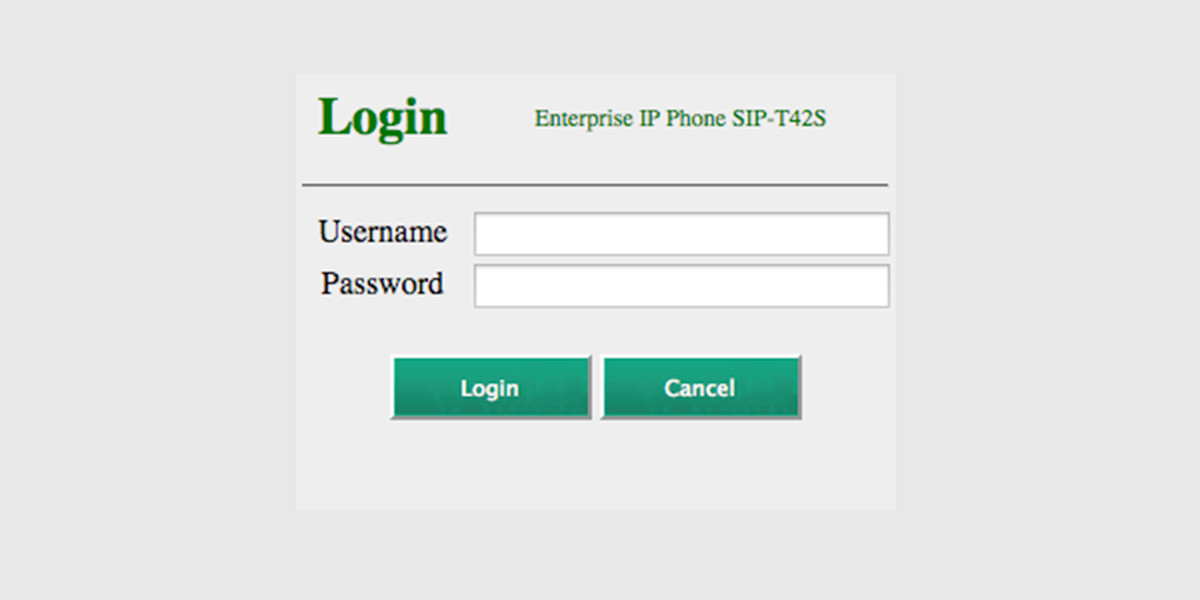
- If this is a new device, user the username and password of "admin". If this is a pre-configured device you are updating, use the username of "admin" and the password as "jetsupport1".
-
- Note: if the credentials are admin/admin - please immediately go into the Security menu and update the password to be "jetsupport1".
-
- From the menu, click into Account. This is where you will configure your extension.
- Select the account you will use. For most devices this is Account 1 (auto-selected).
For more complex needs with multiple extensions configured for presence, click here. - Fill out the following fields using the information in your download sheet from Step 1:
- Register Status: It shows the register status of the current account. This should be "unregistered" until your configuration is complete.
- Line Active: Select Enable.
-
Label: It is shown on the LCD to identify the account. This should be the extension name.
-
Display Name: It is shown as caller ID when placing a call (overwritten by Caller ID for outbound calls away from Jet). This should be the extension name.
-
User Name: This is the SIP username field.
Do not use the Jetphone app/Stretto username. -
Register Name: This is the Authorisation ID from your download file.
-
Password: This is the SIP password field.
Do not use the Jetphone app/Stretto password. -
Server Host: This should be "pbx.jetinteractive.com.au". You only need to fill out Server Host 1.
- Click Confirm.
- The Register Status field should display Registering and then Registered once complete.
- If this field displays Register Failed immediately, check all your information again - particularly your SIP password. Resubmit once done.
- If this field shows as registering for around 15-30 seconds before changing to Register failed, they likely have an internet issue. Check for Dual Bandwidths or other network issues such as firewall, router restrictions, etc.
- If you fail 3 times are trying to configure, check that their public IP has not been added to the blocklist.
- The line will now show as registered.
- If this is a cordless phone, follow the registration steps below.
- Log out of the Yealink config site. Put the phone number 02 5110 3803 on the screen and ask the client to test call. If they hear the audio file, the phone is working.
Additional steps for Wireless handsets
If configuring a wireless handset such as a W53P, you will need to do additional steps to register the handset to the base.
Firstly, the extension details above operate off the Base configuration. When you first plug in a W53, you will need to get the base station IP address from the Status menu of the handset.
After a cordless base has had the Account/extension details added, follow the below steps to register the handset:
- In the Yealink portal in your computer browser, enter the Status menu and select Handset & Voip.
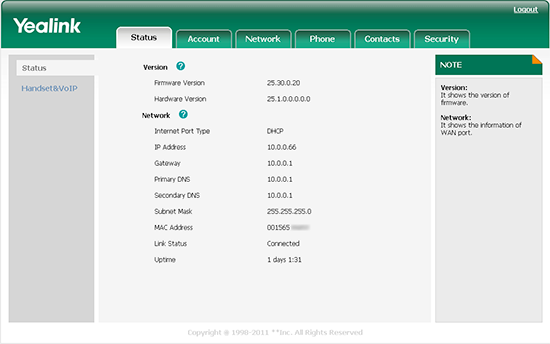
- Select Start Registration.

After this button is pressed, talk the customer through the steps below: - On the handset, navigate to the Settings menu. This will be in the centre on the right with a cog icon.
- Scroll down to find Register Handset.
- Select the top Base Station and press the OK.
- When base station is located, press OK again.
- Enter the base station pin (default: 0000) then press Done to complete registration.
- The handset will make a noise and should now appear in the Yealink web configuration as Registered.
If the handset is not registered, follow the below steps.
- On the handset, navigate to the Settings menu.
- Scroll down to find Register Handset.
- Select your base station and press the OK soft key.
- When base station is located, press OK again.
- Enter the base station pin (default: 0000) then press Done to complete registration.